Showing posts with label baking. Show all posts

Tuesday, July 16, 2013

Lemon Tart

Alternate Title: A solution to the macaron-bakers dilemma


This tart came about as I was thinking of an alternate way to tackle the excess of egg yolks that I am left with every time I make macarons. I usually make the macarons, separating the yolks & whites, and then have a finite time to use the yolks before they go bad. Unfortunately, unlike egg whites, the yolks don't freeze very well, and I usually end up on a ice cream making marathon, a mere days after a macaron marathon. Honestly, it makes me exhausted just thinking about it.

I have plans to make macarons next weekend, so I started thinking about how I might deal with the yolks this time around. I had an ah-ha moment, while searching the internets for egg-yolk recipes for the nth time. Why don't I make something that uses yolks now (or weeks ago, even), and freeze the whites for next weekend. Egg whites freeze very well, and to be completely honest, I think they make better macarons having been frozen.


So with that in mind, and with a family dinner on Sunday, I had the perfect event to bake for. A discussion at SIL's house lead to the revelation that we all love lemon butter, and by extension, lemon tarts. So I had my end point, all I needed was how to get there using the most egg yolks possible.  I resumed the search, but it seemed that there are two camps of lemon tart recipes - those that use a lot of (whole) eggs, and those that use 2-3 egg yolks. Neither really worked for me.


After extensive recipe reading, I came up with something that I was pretty sure would work. It's primarily a combination of a Donna Hay recipe, and one from I blogger I haven't read before - Little Accidents In The Kitchen.


Pastry
  •  1½ cups plain flour
  • 125g chilled butter, cut into cubes
  • ½ cup icing sugar
  • 3 egg yolks
  • 1 tbs iced water
Place the flour, butter and icing sugar in the bowl of a food processor and process until mixture resembles fine breadcrumbs. While the motor is running, add the egg yolks and process to combine. Add the iced water and process until the dough just comes together.

Turn dough out onto a lightly floured surface and gently bring together to form a ball. Flatten into a disk, wrap in plastic wrap and refrigerate for 1 hour.

Lining the tin. The pastry is a little thick, but my arms
were sore from all the rolling!

Roll the pastry out between 2 sheets of non-stick baking paper to 3mm-thick. Line a lightly greased 20cm springform pan with the pastry, trim the edges and prick the base with a fork.
Refrigerate for 30 minutes & preheat oven to 180ÂșC.


Last 10min of baking, quite a bit of shrinkage going on there...

Line the pastry case with non-stick baking paper and fill with baking weights. Bake for 15 minutes, remove the paper and weights and bake for a further 10 minutes or until the pastry is light golden. 

Lemon Filling
  • 7 large egg yolks
  • 2 large eggs
  • 150g sugar
  • Grated zest from 2 lemons
  • Juice from 2 lemon
  • Pinch salt
  • 50g unsalted butter, cut into pieces
Eggs & sugar

In a heat proof bowl over a saucepan of water, whisk together egg yolks, eggs and sugar until the sugar dissolves. Add in lemon zest, juice and salt, whisking continually.


Measuring temperatures

Add butter and cook over medium heat, stirring constantly until the mixture has thickened. This will take 5-10 minutes, or if you're the thermometer using type, it will have reached about 65-75°C.
It needs a bit of assistance to go through
the sieve at this point

Pour the mixture through a fine mesh sieve.


Ready for baking

Pour the filling into the cooled tart shell and bake at 140°C, until the filling is shiny and opaque (about 10-15 mins). The centre will jiggle slightly when shaken.


Let it cool completely, then refrigerate until ready to serve.

Notes:
  • My pastry shrunk quite a bit. I think it's because I was a bit gung-ho with the water. Add it slowly, and as soon as the pastry starts to come together (don't wait for it to ball up in the food processor), turn it onto the bench and bring it together by hand. Nigella has some good tips on avoiding pastry shrinkage, here.
  • The thermometer is really not necessary for the filling. I get a bit nervous when a recipe says to 'stir until thick' as I never know what 'thick' actually means. In this case there is a very noticeable change around the 65°C mark, and the once very runny mixture turns into a thick custard. You can't miss it.
What are your tips for using up excess egg yolks?

-Alphie

Sunday, January 29, 2012

Zumbo-style macaron tower


It seems that I have made a bit of a name for myself at work as a master macaron baker. Mostly because I have been taking all my practice runs in to work so I'm not left eating them all!

This notoriety resulted in one of my colleagues requesting an Adrian Zumbo style macaron tower (for 100!) for his wifes 40th birthday. I hesitantly accepted the challenge (for a fee!), with the disclaimer that I'm ok to make macarons for 100, but I was not so sure on the 'tower' part.

So, given that I recently spent a weekend making 150 macarons, I thought I'd share my current macaron recipe. I've switched from the French method to the Italian method, and while it requires a bit more work & messing about, it has much more reliable results. And, they look a lot better too!

The tower required me to make three batches of macarons - raspberry, mocha (or choc-coffee) and salted butter popcorn - giving 150 filled macarons in total. After a full day of baking and filling the macarons, I left them in the fridge overnight so they would be nice and firm for the assembly stage.

As I suspected, the tower was by far the most difficult part. It started badly when I struggled to find any reasonably sized styrofoam cones that are required to form the base of the tower. I finally tracked down an art shop in Perth that stocked them up to the largest, 550mm, size, but being the Christmas/New Year period, were not able to get one in for me in time. Conveniently I was in Melbourne for work the week before I needed the cone, and had a ring around there to see if I could track one down, but again, no success. After the first option fell through, I organised to hire a back up option from a local bakery, but I was never really happy with this option, so I tweeted the master himself, Adriano Zumbo, to find out where he gets them from - success!! Zumbo suggests a specialist foam cutter. We managed to track one down in Perth, who was happy to assist at the last minute, but could only cut a pyramid, not a cone. At this stage, Mr Alphie stepped in, and, after covering our dining room with styrofoam offcuts, turned a 550mm high, 200mm square pyramid into a 550mm high, 200mm diameter cone.

Mr Alphie trimming the pyramid into a cone

The drama with the cone extended to the assembly stage. After reading a few blogs on the best way to attach the macarons, I started spearing the tower with toothpicks and sticking the macarons on in a way that resembled a kindergarten craft project. Halfway around the bottom row, I gave up. I just couldn't get them to sit right, they kept falling off, it was a disaster. For the second time that day, Mr Alphie stepped in, taking over the assembly, and with a lot more patience than I will ever have, created a macaron tower to rival Zumbo!

 Mr Alphie assembling the tower


The assembled tower taking over the fridge!

Italian Macaron Method
Adapted from a Caroline Velik recipe, SMH Good Living, May 17 2011
makes approx 100 shells, or 50 filled macarons
  • 200g almond meal, laid on a tray overnight (or up to 2 days) to dry out
  • 200g pure icing sugar* (not icing mixture)
  • 150g egg whites (approx 4 large eggs) sieved, and left out overnight to dry out
  • ¼ tsp cream of tartar
  • 200g caster (or regular) sugar
  • 50g water
  • food colouring, if required (gel or powder is best)


    Process dried almond meal and icing sugar together in a food processor to combine and get a finer consistency.


    Sift combined almonds and icing sugar together, twice, discard anything left in the sieve each time.


    Divide the egg whites into two 75g quantities. Mix one lot into the sifted almonds & sugar to make a thick paste, and set aside.

    Put the remaining 75g into a (very clean) mixer bowl, fitted with a whisk attachment, with the cream of tartar, and set aside.

    Put the caster sugar and water into a small saucepan over a medium heat**. Use a candy thermometer to monitor the temperature, and once at 110°C, start whisking the egg whites on low, increasing the speed until thick.

    When the sugar syrup reaches 118°C, and the egg whites are ready, slowly pour the syrup down the side of the mixer bowl, while on medium. (If the sugar syrup gets too hot while the egg whites are not quite ready, add 3tsp more water to the syrup to cool it a bit.)

    Continue to mix for 10 minutes, or until the meringue cools - the bowl will still feel slightly warm.


    Using a spatula, mix the meringue into the almond meal paste, mixing until it becomes supple and shiny, this texture is often referred to as lava-like.

    Fill a piping bag, fitted with a plain 0.5-1cm nozzle pipe 3cm rounds onto a lined baking tray. I use a template created for me by my graphic designer sister in law, but you can trace circles on the reverse of the baking paper lining the tray, or come up with a template yourself!


    Leave the shells to dry for 5-30 minutes, or until they are just dry to the touch. They should still be soft, but just not sticking to your finger when you prod them. This step really depends on your climate. In Perth, in January, it's not really necessary at all, but in more humid climes, you might find you need more than half an hour.


    Bake in a pre-heated 140°C oven for 10-12 minutes until they are firm, but just before they start to colour.

    *For chocolate macaron shells, replace 25g of the icing sugar with cocoa powder
    ** For coloured macaron shells, add the colouring to either the meringue or the sugar syrup when it's around 110°C. It will take a bit of practise to know how much colour in the syrup you need to get the right coloured shells, but it is considered the best time to add food colouring.

    To fill the shells, you can either use ganache or buttercream. Ganache is much easier to make, but buttercream gives you more flavour options without the overpowering chocolatey-ness of a ganache. But that is a post for another day...

    Monday, October 10, 2011

    Perth Royal Show - Cookery Competition

    This year I decided to give myself a bit of a challenge, so I entered the Cookery Section of the Perth Royal Show. I had entries in five categories, and unfortunately no wins/places, but I had fun!

    My entries all packed up a ready to go!

    I entered class 411 - Biscuits, class 426 - Orange Cake, class 436 - Classic Coloured Macarons, class 459 - Jam, Berry and class 468 - Chutney.

    The show ended on Saturday, and entry collection day was today. I left work early to head off  to the Claremont showgrounds in time to collect my entries and feedback. Mostly I was after the feedback. Who wants a two week old cake?? I opted to leave the stale bikkies and (very) mouldy orange cake behind, but took home my jam and chutney.

    As I said, the feedback was what I was really after. I had a good look at the entries in my classes on opening day, and I wont deny I was a bit sad to see I hadn't got even one highly commended. Its really hard to walk around and see your entries along side others with the 'first place' card on them, and not be able to see much difference between the two. I had a chat to one of the stewards on the day, and she assured me I would get feedback when I came in on collection day; 'How else will you do better next year, love?'.

    Unfortunately I didn't get the judging notes on all my entries, the biscuits below being one of those, so I'll just have to give it another go next year and hope that goes better!

    Class 412 - Biscuits (mine are bottom row, second from the right)
    The comments on my chutney were not that surprising - good presentation, colour/appearance and texture/consistency, but lacking a depth of flavour. Unfortunately I didn't make it when tomatoes are at their peak, which I think has a lot to do with it. I just need more practice!

    Class 468 - Chutney (bottom left corner)
    Again, no comments on the jam, but having seen the open jar this afternoon, I think it was probably too thick/well set. It had a bit of a 'hospital jelly' consistency.

    Class 459 - Jam, Berry (top row, second from right)
    The orange cake was my main disappointment - I had been practising that baby for months (not that anyone in the office is complaining!), and the judges comments were good too; good appearance & colour, nice texture, and good flavour; so it's hard to know what went wrong...

    Class 426 - Orange Cake (bottom level, back left)
    I don't have a photo of the macaron entries (class 436), but it was fairly obvious on the day why mine weren't winners. They were quite bumpy on the surface in comparison to the others, and the piping marks were still visible. The judges notes reflect that; appearance - 'a little uneven, a smooth surface is preferable', texture - 'needs to be more crispy', but a good colour and flavour. I generally make macarons using the French method, but I think it might be time to give the Italian method a try as it seems to give smoother shells.

    I also entered a couple of soft toys in the craft competition, with similar results (i.e. none...).

    So that's how the show went for me. No real successes, but some things to work on for next year.

    -Alphie

    Monday, March 7, 2011

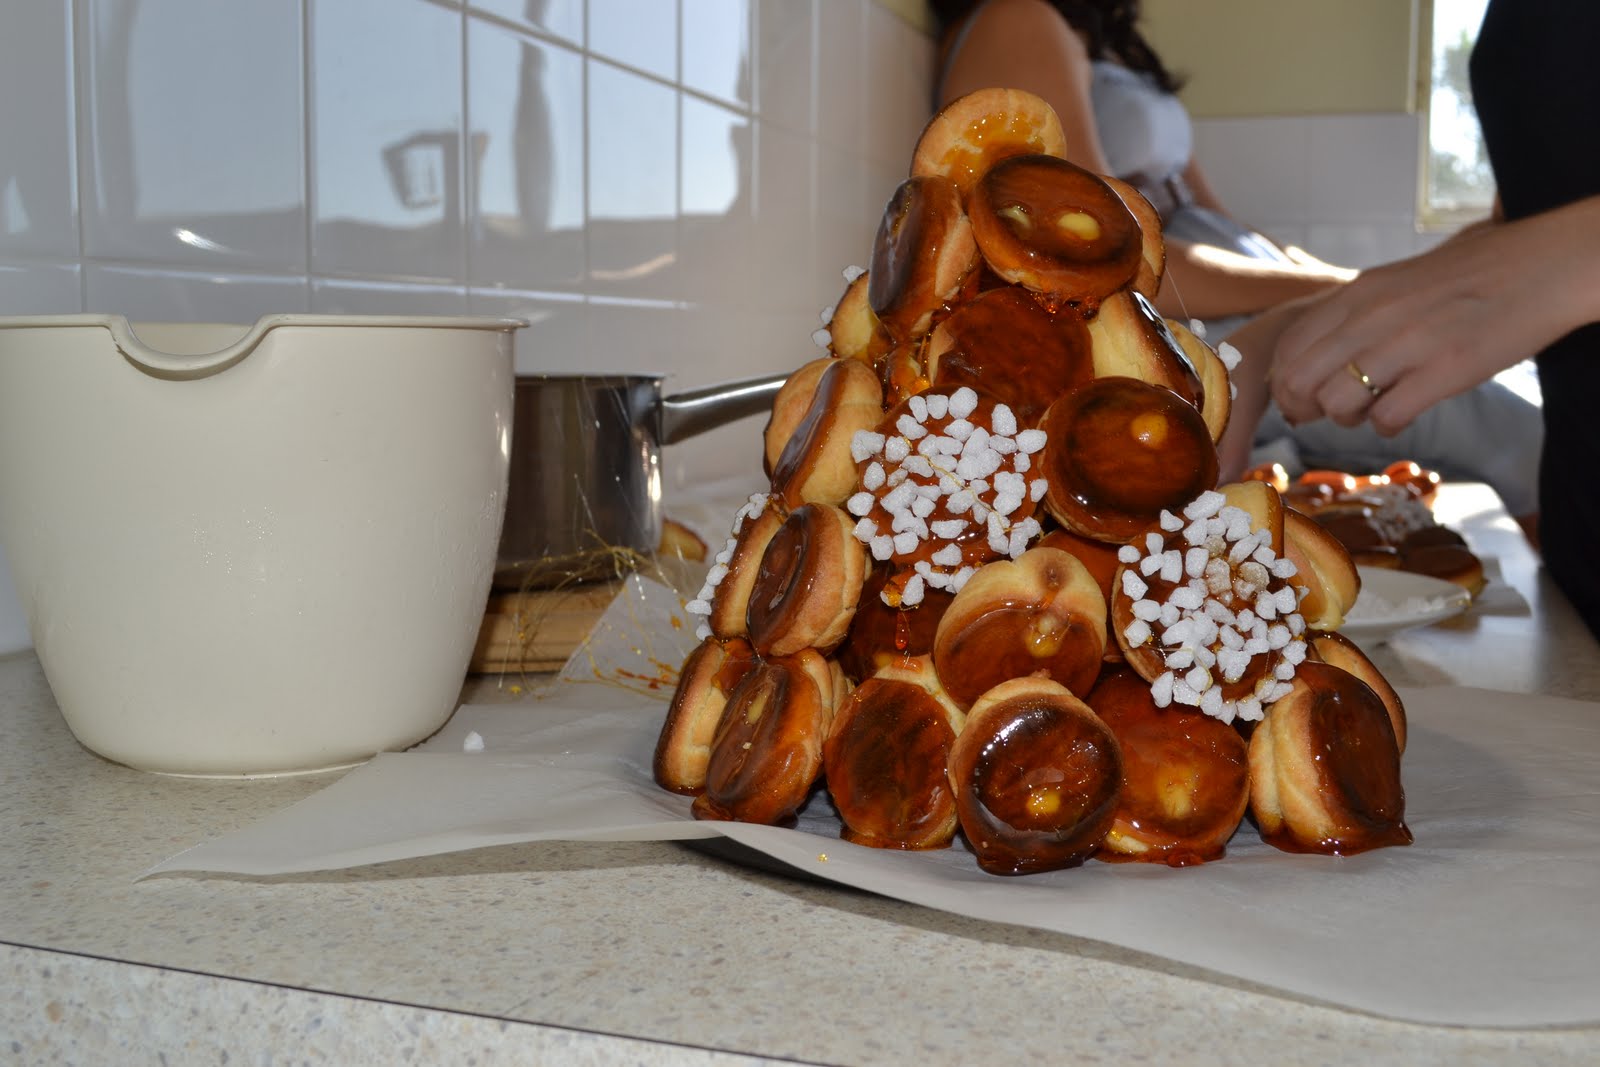
    Adriano Zumbo's MasterChef Croquembouche

    Thanks to Ms Red and E for their fab photography skillz.

    As promised, I have regained my blogging mojo in a spectacular fashion. I spent the weekend in Ms Reds Bunbury apartment, attempting in the infamous MasterChef croquembouche.

    It was nothing short of a mission (and I only did a half batch!). I started at about 9, and we were done by 5, with another hour or so to clean up the mess I created in her tiny kitchen (most of that time was spent de-toffying the benchtops, floor and saucepans...). That said, I didn't attempt this at a MasterChef like pace - Ms Red and I went out for a spot of shoe shopping and then broke for lunch in the middle of it all.

    I'm not going to give you the recipe for this one - it's on the MasterChef website, and to be honest, it's mammoth, and will take up a whole lot of space.

    I started with the choux pastry, and unfortunately don't have many pictures of this, as Miss Red was indisposed (read: in the shower) when I started off. Before adding the eggs it was quite crumbly, but did hold together when pressed (a bit like shortcrust pastry). I had my doubts about it ever becoming a 'pipe-able' consistency, but 8 eggs later, it turned into a glossy, smooth batter.

    glossy choux pastry batter

    Then on to piping and baking, I had hand cramps after one piping bags worth of pastry, the second was a nightmare! They didn't look great before baking, and I had concerns they would stay in that piped 'cartoon poo'-like shape. Luckily they didn't and puffed up just like they were supposed to.

    ready for baking...

    ...out of the oven

    Next up was the crĂšme pĂątissiĂšre, not much different to the custards I have made previously, and, in the scheme of things, quite simple. Although, by this stage both Miss Red and I had sore arms from all the mixing and beating, as thanks to an unfortunate accident in a university share house, Ms Red no longer has a fully functioning mixmaster...

    stirring, stirring, stirring

    Once the crĂšme pĂątissiĂšre had chilled, it was time to pipe it into the choux pastry puffs. For some reason about half of the puffs had collapsed, making it quite hard to fill them without spurting the crĂšme pĂątissiĂšre out everywhere. I think I needed a smaller nozzle tip - I did a fair bit of damage with the one I used, and most of the puffs had obvious crĂšme pĂątissiĂšre holes.

    filling with crĂšme pĂątissiĂšre

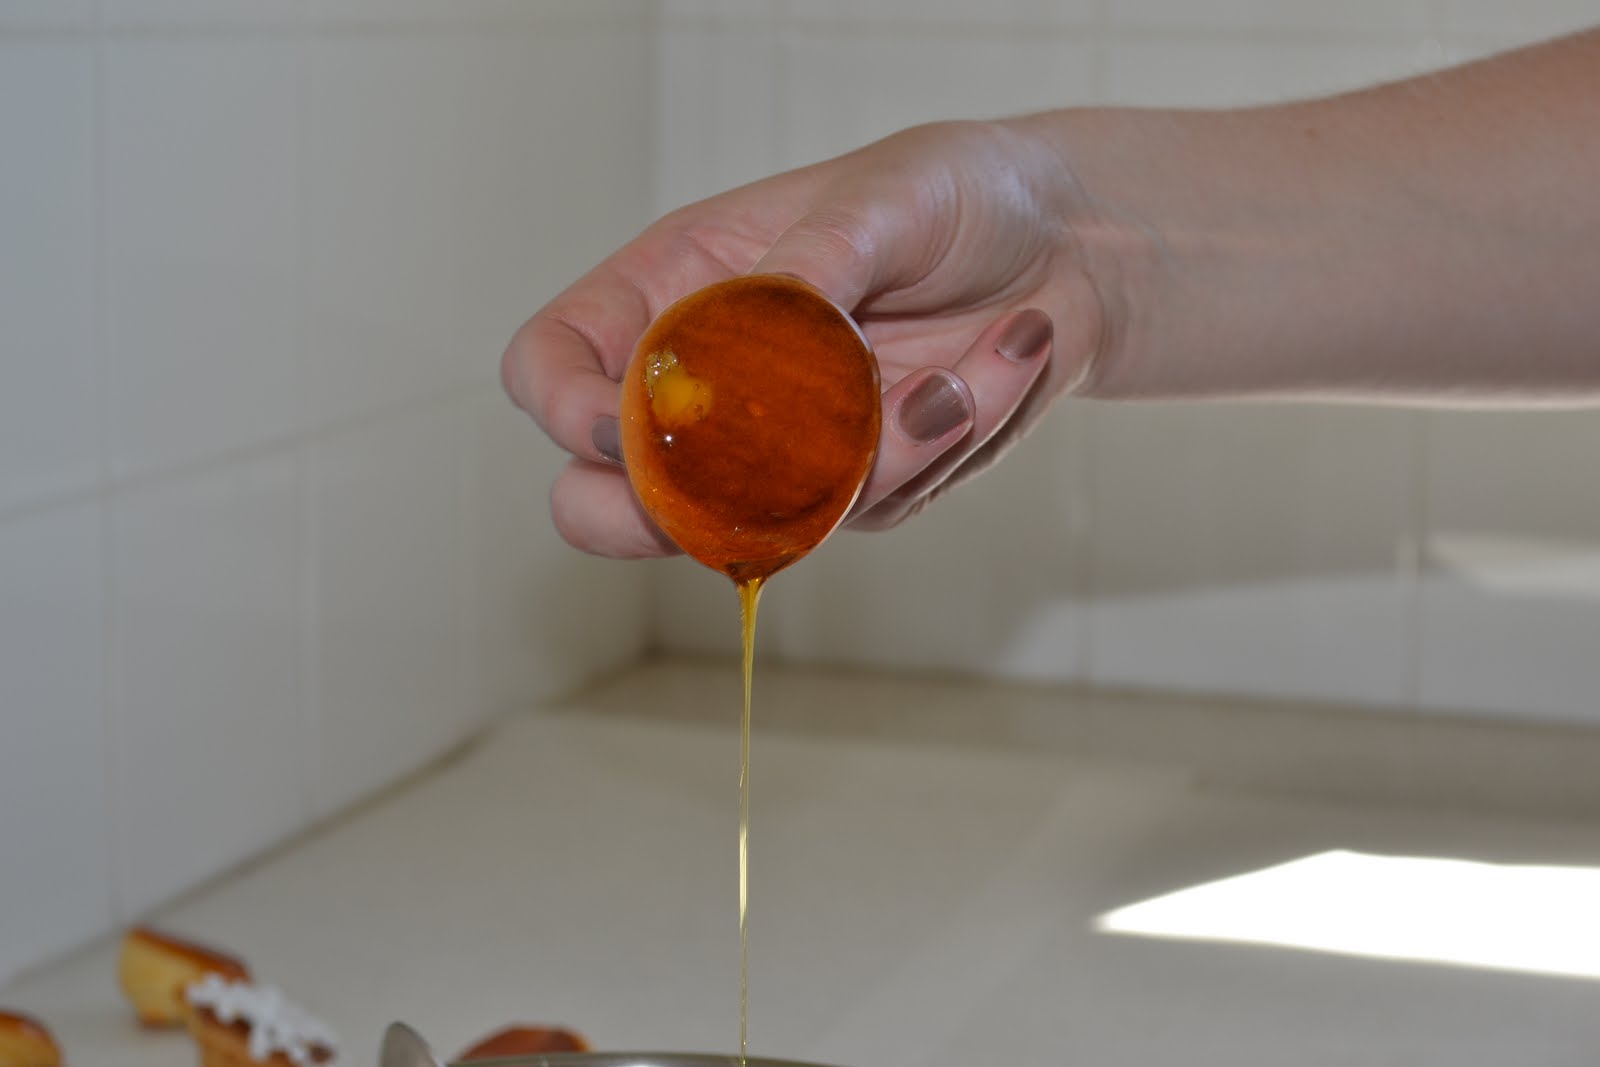
    Then on to the fun part - the toffee! I ended up needing to make a second batch as I ran out before the 'assembly' part. Each puff was dipped in toffee, and some in pearl sugar as well. As per the recipe's advice I had a bowl of iced water handy in case of hot toffee burns, and it was well used!

    dipping in toffee

    all lined up for assembly

    Then on to the assembly, as you can probably tell, I didn't have a croquembouche cone, so I went free-form. Ms Red and E were watching keenly, and directing the location of each puff. Given I didn't have a cone, I think it turned out alright, but next time (if there is a next time!) I'd use a cone as I think it gives a better finish.

    the assembly - E in the background

    Adriano suggests you finish with some spun sugar, but Ms Red was not prepared to let me decapitate her whisk, so I attempted with a fork, not to much success.

    And lastly, a word of warning - even with the iced water, toffee burns are not impossible, see exhibit A below...

    exhibit A - the toffee burn

    I'm glad to back guys - I'll make an effort to create something worth blogging in my dingy kitchen soon.

    -Alphie

    Tuesday, December 21, 2010

    Christmas Gifts and Goodies

    So, this post was originally going to be about my annual gingerbread mission, but it was just so darn hot in Perth on the day I chose to make them that they near-melted every time I got the dough out of the fridge. And, as a result, all plans for photos went right out the window. I have two photos of creaming butter and sugar and one of the dough resting in the fridge - not conducive to an interesting blog post.

    I was about to give up on the Christmas themed post, until FMIL requested my rocky road, which reminded me of my other Christmas gift staple, which couldn't be further from gingerbread on a difficulty scale...


    I found this recipe in SFI 3 years ago, and it's been getting a good run in our house every year since - I've even made it for Easter... I have made a few minor changes to the recipe, and always make a dark chocolate version too - for FH Alphie and his dad, who loooove dark chocolate.

    The key is to use the best chocolate you can get. I usually use the Nestle Plaistowe white cooking chocolate blocks, but in an attempt to make this palm oil free, I went with Cadbury Dream this year, and it didn't work so well. Cadbury Dream doesn't melt so smoothly or so thinly, making it hard to mix in, and it it super-sweet and overtakes the rest of the rocky road. For the dark chocolate, I would most definitely recommend the Lindt Dessert 70% cooking chocolate (available at my local Bi-Lo, of all places!), although, the Nestle Plaistowe cooking chocolate blocks are good too.

    Gourmet rocky road
    • 400g white chocolate
    • 1/2 cup pistachio kernels
    • 2/3 cup shredded coconut
    • 100g bag mini marshmallows
    • 2/3 cup craisins (dried cranberries)
    an example of 'just a little bit longer' leading to slightly over-toasted coconut...

    Toast the pistachios and coconut in a 150 degree oven for 5 minutes - keep an eye on them though, it will turn from 'just a little bit longer' to charred, in seconds.


    Melt the chocolate over a double boiler, stirring frequently. Once melted, add marshmallows and stir to combine, then stir in the remaining ingredients; pistachios, coconut and craisins.


    Spoon into a foil lined slice tin (27cm x 17cm), and leave to set in the fridge for about 30 minutes. Remove foil, and cut into reasonable-sized pieces - the original recipe suggests 24, but just go with a size that works.


    For the dark chocolate version, I chop 3x 55g turkish delights in place of the craisins, 1/2 cup of almonds for the pistachios, and use dark chocolate (obviously...)

    -Alphie

    Sunday, October 10, 2010

    Macarons, take 4

    So, I'm pretty heavily on the macaron bandwagon now... today was my third attempt since FSIL gave me that awesome macaron book.

    piping templates - thanks to FSIL!

    I decided to try a few new things today though. I increased the size of the macarons, from the 3cm suggested in the book to 4cm (yay! for FSIL's graphic design talents, making me piping templates). And I also only make half batches, as I wanted to make two types, and didn't want to have an excess of macarons, as has happened the last three times I've made them. This combination kinda backfired on me, it turns out that a half batch, piped to 4cm, only makes about 24 shells (12 macarons), which felt like a lot of effort, for not much of a result. So, batch two was back to the full recipe.

    pink egg whites

    I made coloured shells this time, which was a first (for this recipe) for me, and I'm still getting the hang of it - even though my egg whites were quite obviously pink, the shells were less so. Also, when we increased the size of the piping template, we forgot to increase the gap between the circles, and the first batch was quite soft... three piping attempts later and I had a set of non touching shells. Lesson 1 - they will spread! leave room, and gauge how runny the mixture is.

    not so pink shells (dusted with cocoa)

    And they only got paler in the oven! Lesson 2 - use more colouring than you think is necessary.

    raspberry & chocolate macarons (note the super pale shells!)

    The filling for the pink shells was simple - raspberry puree and dark chocolate, and is surprisingly tasty, I was doubtful of the combo, but it is very moorish, and the raspberry is the perfect counter to the rich chocolate.

    chocolate & orange macarons (also pale shells, but not so bad)

    The second, orange shelled, batch caused more trouble though. Something in the chocolate/cream mixture split, and it became oily and strangely textured. Some serious beating once it had cooled slightly pulled it back together. Then I left it in the fridge for too long while skypeing with FH Alphie... after trying to pipe some seriously hard ganache, I put it (piping bag and all) in the microwave for 15 seconds, which was enough to send it back to the weird oily stage. Back into the fridge again, and a call from my parents later, and it was getting to hard to pipe, again.... But, It all came good in the end. Lesson 3 - don't think that it's all easy once the shells have been baked - pay attention to your ganache!

    -Alphie

    Wednesday, September 22, 2010

    Macaron Mayhem, take 2

    As promised, my new macaron cookbook got a workout this weekend. Mr FSIL and I had what was originally intended to be a MasterChef style macaron bake off... until someone reset the timer, and we realised we there wasn't really enough equipment for both of us to be going flat out at the same time.


    I was allocated the Almond Praline Macarons, while Mr FSIL was given Gingerbread-Spiced Macarons. Both were basic macaron shells (coloured in his case) with flavoured chocolate ganache filling.

    The piped shells - waiting for a crust to form

    Out of the oven - they have 'feet'!

    Almond caramel, before crushing

    Matching the shells

    They were definitely a vast improvement on my last attempt. The shells had a definite crunch, I got them to form a crust before baking and they had feet!!!

    Unfortunately, it was deemed a tie. Although even Mr FSIL admitted that mine tasted better than his the next day -the filling in his now tastes a bit strange.

    Mr FSIL's gingerbread-style macarons